Pages

Details. . .

My photo
Reminding myself daily to bloom where I'm planted.

Monday, September 7, 2015

Folk Art Bird House


My dear friend Dede designed a series of bird houses
and her very handy and skilled husband made them for her. 

She gave me two of them as a gift. 
The one featured here was unfinished.
It was a "blank canvas" for me to play with. 


I began by taking off the hardware and taping off the roof.
I decided to go with a light warm neutral base
(because it's what I had the most of).


My design theme prior to starting was rustic
Mexican folk art. 


I was inspired by my recent trips to 
Tucson and Albuquerque. 


I may work a little more on the back. I was in a 
hurry to finish up. Actually, I wanted my kitchen
table back after 4 days of having it covered with
newspaper and paint supplies. 


Happy Holiday and Happy Creating!

Wednesday, September 2, 2015

Paper Napkin Decoupage Tables

I recently purchased a couple of tables from 
my local Goodwill and decided to redesign them.

Unfortunately I didn't get a before picture, but
they were both plain wood with a medium stain. 

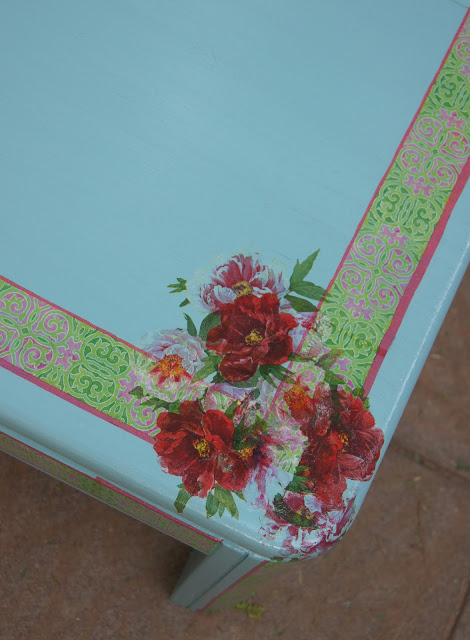
I decided to do a paint and paper napkin decoupage
design on both of them. 

This is how the end table turned out. 


Here's a shot of the coffee table and end table together.


The paint color is a pretty robin's egg blue that
I picked up from the "oops" paint shelf at Home Depot for $2.00.

I can't go into Home Depot without checking out 
the "oops" paint shelf. It's a great way to stock up
on your paint supply. 


I watched a couple of Youtube videos on decoupaging 
with paper napkins. I gleaned a couple of take 
away tips from watching those tutorials and came
up with a tip or two of my own. 

Most decorative paper napkins have 3 layers. Try
and use just the very top, thin, almost transparent layer.

The second tip was to use a sheet of plastic wrap to
stretch over the top of your freshly glued design to
press out any air bubbles. 

I also discovered using
an artists paint brush and starting in the center
of your design (over the plastic wrap) to brush
out the air bubbles worked well. Using the
handle of the paint brush as a rolling pin
also worked to smooth out the design.


Happy Creating!

Tuesday, September 1, 2015

Cane Chair Redo


I picked up these two cane chairs at my favorite local thrift store for $3.49 a piece. 

Nice bargain, right?


Unfortunately, each chair had it's own issue with holes in the caning. 

I wonder how many people have these old 
damaged cane chairs stored away somewhere 
waiting to be fixed. 


I had no interest in getting them professionally re-caned (too expensive). 

Not only that, I wanted to challenge myself to see what I could come
up with in regard to repairing them myself. 

The seats are upholstered so nicely and professionally.
Had I attempted to re-cane them myself, 
I would've had to take the upholstery apart, 
which I dreaded doing. 

I brought out my DMC floss thinking I may somehow 
incorporate it into the fix, but changed my mind. 


I ended up weaving strips of cotton material 
(that I ripped apart, as opposed to cutting) 
through the caning.

When the weaving was complete, 
I strategically placed and sewed on two handmade fabric flowers.

Here's how this first chair redo turned out. 


Isn't it cute?

I still have some staining to do on parts of the wood that need some
extra attention due to wear, but this one is basically done. 


I'm still working on the second chair. 
It had a trickier issue, so I decided to tackle the easier fix first. 

I'll be sure to post an update of the second chair redo as well. 

Happy creating!