Pages

Details. . .

My photo
Reminding myself daily to bloom where I'm planted.
Showing posts with label thrift. Show all posts

Sunday, January 3, 2016

My Artsy Thrift Store Finds

Hunting for treasures at my local
thrift store is one of my favorite things to do. 

I love finding unique things
that I can transform into something special. 

Some of the things I find are perfect
just the way they are. 

I've got a mix to show you
from my recent $12 shopping spree. 

The following is a carved
wood sun mirror that I picked
up for just 5 bucks. 


It's dirty and a little
beat up, but I see a lot of potential in this guy. 

I can't wait to pull out my paint and start working on it. 


The next thing that caught my eye
was this coral spider vein stone ring. 

It's big, funky and chunky and I love it. 

It goes well with my spider vein
turquoise Navajo silver cuff. 

I paid $3.50 for this ring. 


The last item I want to show you is 
this sweet Jenny Krauss zip purse.

It's handmade by women in Peru.

It still has the tag on it and was only $3.49!


This is a great time of year to 
check out the local thrift stores.

There're a lot of donations coming in with people 
wanting to start out the year free of clutter.

Someone else's junk was this woman's treasure. 

Happy New Year dear friend!

Monday, December 14, 2015

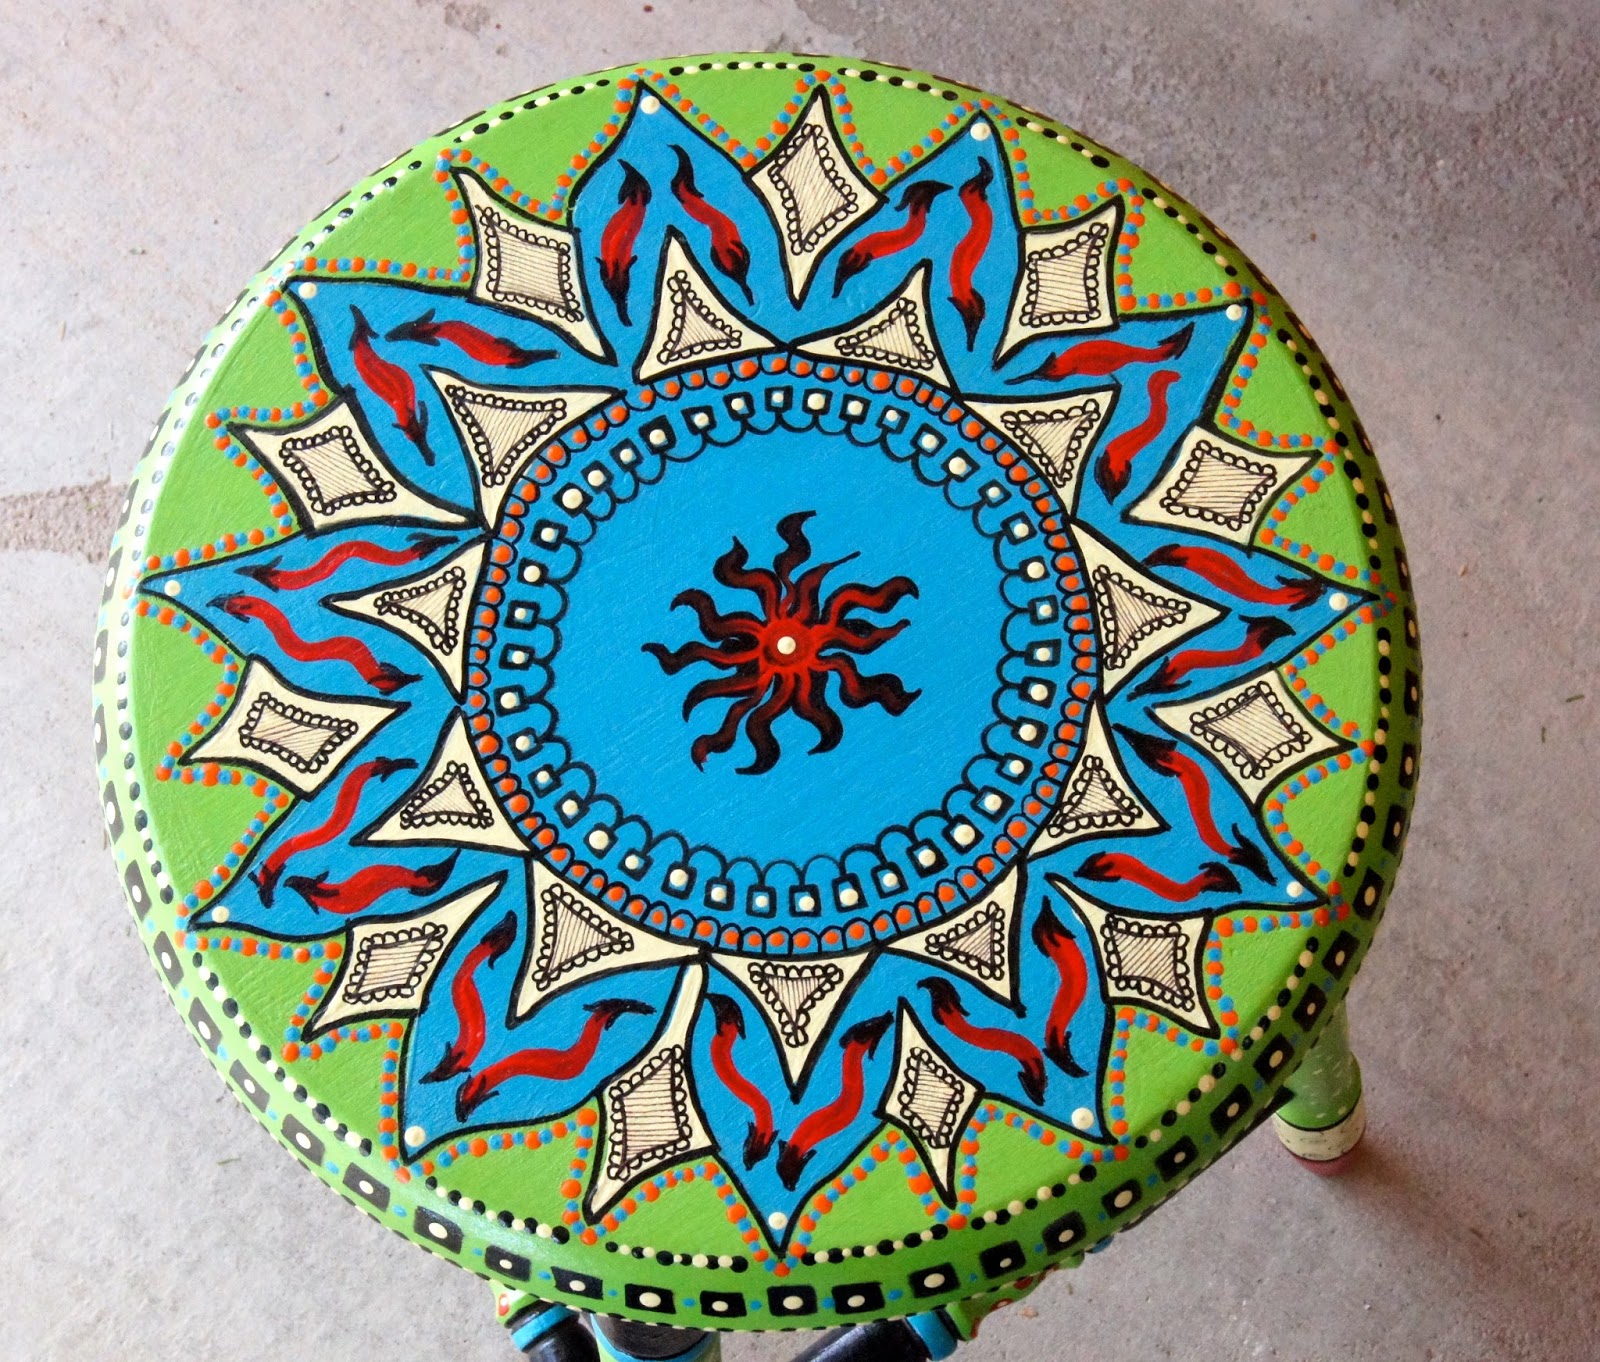
Oak Stool Upcycle


I found this oak stool
at the thrift store for seven dollars.

I saw some potential and couldn't pass it up. 

It wasn't wobbly, or in need of repair
which is an extra bonus for me. 

All it needed was some paint and a little TLC. 


Pieces don't have to be cosmetically perfect for 
me to work on. I don't do much
sanding and patching, unless it's really bad. 

A really good full coverage primer
to start will usually takes care of things to my liking. 

After priming, I started with a bright green acrylic base. 


I usually pick out my colors in advance,
but the design is created as I go. 

For no rhyme or reason, I typically choose an odd 
number of colors (usually 3, 5, or 7), and it 
always seems to balance nicely.

Here's where I drew out a rough pattern
on the seat and started filling it in. 


Now I'm starting to get somewhere.


Here's the finished piece after
I gave it a couple coats of polyurethane. 


This is a close up of the seat. 


This project took me about a week to complete. 

Turning trash into treasure
is one of my favorite things.

Tuesday, September 1, 2015

Cane Chair Redo


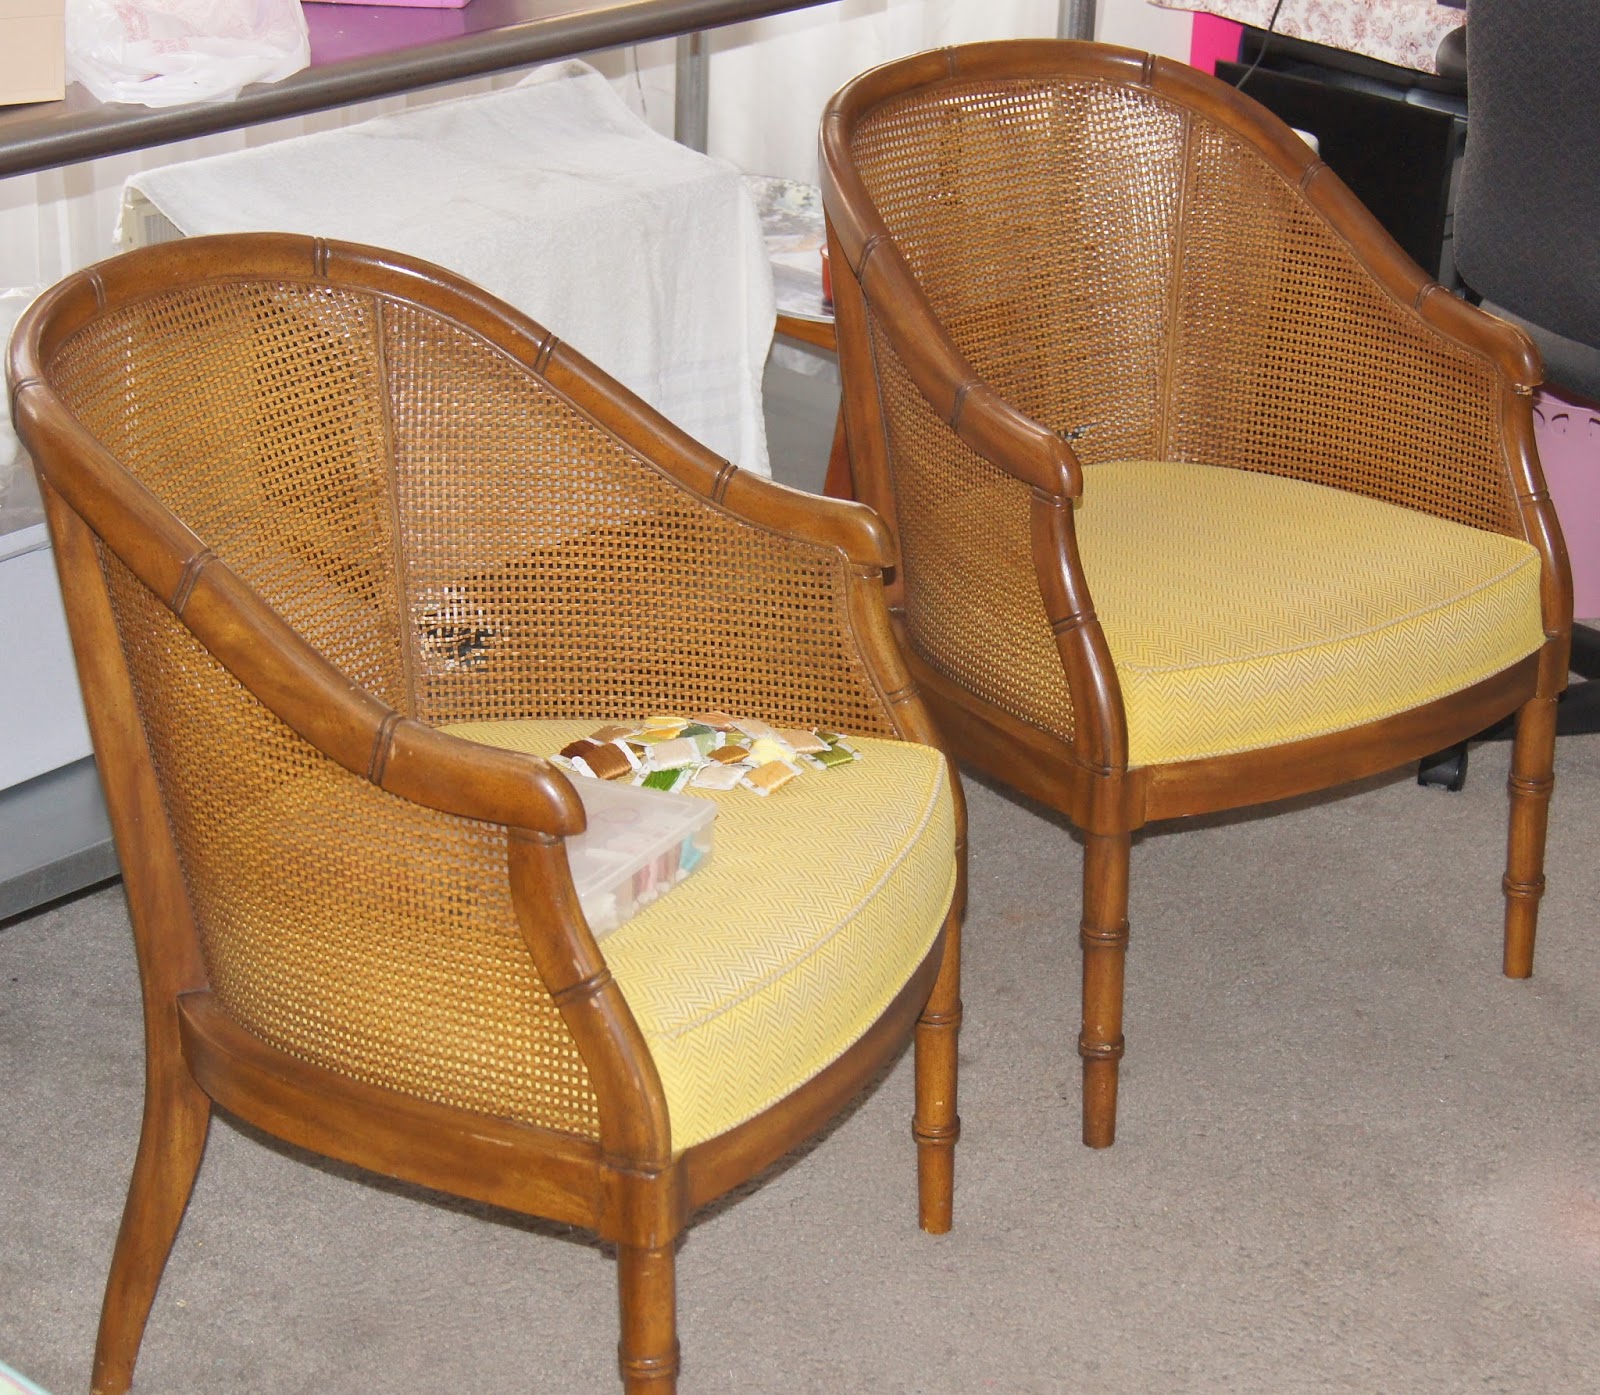
I picked up these two cane chairs at my favorite local thrift store for $3.49 a piece. 

Nice bargain, right?


Unfortunately, each chair had it's own issue with holes in the caning. 

I wonder how many people have these old 
damaged cane chairs stored away somewhere 
waiting to be fixed. 


I had no interest in getting them professionally re-caned (too expensive). 

Not only that, I wanted to challenge myself to see what I could come
up with in regard to repairing them myself. 

The seats are upholstered so nicely and professionally.
Had I attempted to re-cane them myself, 
I would've had to take the upholstery apart, 
which I dreaded doing. 

I brought out my DMC floss thinking I may somehow 
incorporate it into the fix, but changed my mind. 


I ended up weaving strips of cotton material 
(that I ripped apart, as opposed to cutting) 
through the caning.

When the weaving was complete, 
I strategically placed and sewed on two handmade fabric flowers.

Here's how this first chair redo turned out. 


Isn't it cute?

I still have some staining to do on parts of the wood that need some
extra attention due to wear, but this one is basically done. 


I'm still working on the second chair. 
It had a trickier issue, so I decided to tackle the easier fix first. 

I'll be sure to post an update of the second chair redo as well. 

Happy creating!