Pages

Details. . .

My photo
Reminding myself daily to bloom where I'm planted.
Showing posts with label acrylic paint. Show all posts

Monday, December 28, 2015

Paper Mache Cross with Roses Shrine

I just finished my paper mache 
cross and roses shrine.

It can stand on it's own, or hang on the wall. 

I think I'd like to buy a little
flameless tea light for it. 


We had a wonderful Christmas filled with blessings.

I hope you did as well. 

Now we're looking forward
to our daughters wedding on New Years Eve!

I'm still trying to think of something
meaningful I can make for her and my soon to be son in law.

I'll be sure to share it when I do. 

Happy New Year!!!


Friday, November 27, 2015

Love Shrine

This is how my "Love Shrine" started out.

The base is an old Lang Christmas card box.

(Whenever I come across a good strong box, 
I always tuck it away for a future project.)

I designed a fancy asymmetrical frame to go around it, built it
up with some air dry paper clay and cardboard 
designs, and then paper mached the whole thing. 


 Once it thoroughly dried (about 2 days),
I primed it with Zinzer Bullseye 123.

I used assorted acrylic and dimensional paints to create
a primitive design, which I sealed with a gloss medium. 

It's embellished with some cold porcelain clay roses
and rhinestones. 


It's rustic, simple, bright and cheery.


I may need to add some glitter modge podge
to the frame to give it even more pizazz. 

Either way, I "LOVE" it!


Monday, November 23, 2015

Star and Cross Shrine

This is the completed star and cross shrine
that I mentioned in my last post. I say completed,
but I'm still pondering adding something
to the bottom right (inside) corner to hide some
bubbling that occurred in that area. 

I still need to figure out how
to hang my shrines.

There's not a lot of weight to the piece, but
any hanger will need to be adhered with 
glue of some kind. I want something that'll
be sturdy and long lasting, but won't damage the piece. 

I'll have to see what Home Depot has available. 


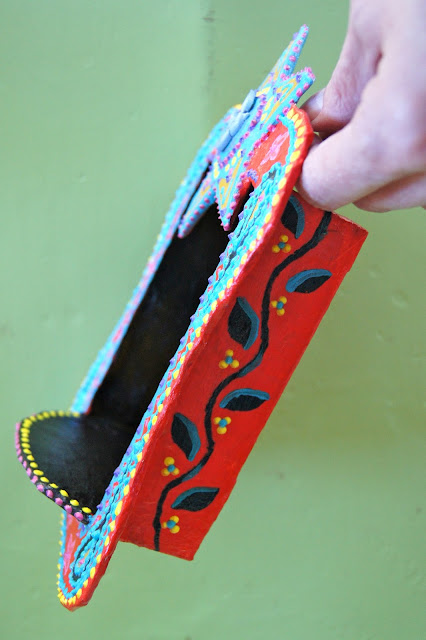
Up next is a side view of the piece. 
I had to make that pretty too.

You can get more of an idea of
it's size next to my hand in this pic. 


On Wednesday, I plan to share some funky
Christmas ornaments that I'm working on.

Hope your day is a good one!

Tuesday, November 17, 2015

Bird and Bear Nicho

The base of this nicho is an empty crab meat can.  
It's a little deeper than a tuna can.
I washed it well and made sure to get rid of any odor. 


My next step was to draw and cut out a cardboard frame 
to fit the opening of the can.

I taped the frame to the can with masking tape. 
 Using my homemade air dry paper clay, 
I built up some dimension and ridges
on the frame and paper mached the whole thing. 

It took a full 24 hours to dry before
I coated the whole thing with Zinzer 123 Primer. 


The following picture is the completed piece.
I used an old greeting card for the background and some reindeer moss
for the inside surrounding edge.

The roses were made from my cold porcelain clay.
I used acrylic paints and dimensional fabric paints (which 
may be used on surfaces other than fabric). 

I coated the outside with Liquitex Gloss Heavy Gel Medium. 


Because of the depth and the visibility of the outside
of the can, it needed some embellishing as well. 


I haven't finished the back yet because I have to figure out
how and if I want to hang it.

It sits nicely on a flat surface, but I think it'd be cute hanging as well. 

Once I figure that out, I'll add a meaningful quote and my signature 
to the back and give it a quick coat of the gloss medium.