Pages

Details. . .

My photo
Reminding myself daily to bloom where I'm planted.

Friday, November 27, 2015

Love Shrine

This is how my "Love Shrine" started out.

The base is an old Lang Christmas card box.

(Whenever I come across a good strong box, 
I always tuck it away for a future project.)

I designed a fancy asymmetrical frame to go around it, built it
up with some air dry paper clay and cardboard 
designs, and then paper mached the whole thing. 


 Once it thoroughly dried (about 2 days),
I primed it with Zinzer Bullseye 123.

I used assorted acrylic and dimensional paints to create
a primitive design, which I sealed with a gloss medium. 

It's embellished with some cold porcelain clay roses
and rhinestones. 


It's rustic, simple, bright and cheery.


I may need to add some glitter modge podge
to the frame to give it even more pizazz. 

Either way, I "LOVE" it!


Wednesday, November 25, 2015

Sugar Skull Egg Ornaments

I came across these eggs while digging through
my craft supply box. 

They were a half off "after
the holiday" purchase from Walmart. 

I wish I'd picked up
several dozen. I'm hoping they
carry them again this coming Easter. 

They are so much fun to work with!


I decided to make a sugar skull ornaments with the eggs and 
used my very fine artist markers for the design. 

I finished it off with lace, a flower bead, and beaded straight pin.

Black ribbon was used for the hanging loop and I glued 
all those things together with Tacky Glue. 


The back had to say Feliz Navidad!


After making a "her" I had to make a "him".

I started by making a black hat with a purple rose
and green leaves out of cold porcelain clay and let 
that dry for 24 hours. 

In the meantime, I worked on his face
and back "Feliz Navidad" greeting. 


The hat and ribbon were adhered
with a black beaded straight pin
and Tacky Glue. 


I love the way they turned out and am
anxious to show you some more that I've just finished.

I learned from the first ornament, not to use my artist markers.
While they're great for drawing on paper,
they smeared a bit as I turned the egg in my
hand to work on it. 

With my subsequent ornaments, I used permanent markers
(Bic and Sharpie) as well as Pitt Pens.
They all worked well together and didn't smear. 

Happy Thanksgiving.

I hope you have a wonderful holiday!

Monday, November 23, 2015

Star and Cross Shrine

This is the completed star and cross shrine
that I mentioned in my last post. I say completed,
but I'm still pondering adding something
to the bottom right (inside) corner to hide some
bubbling that occurred in that area. 

I still need to figure out how
to hang my shrines.

There's not a lot of weight to the piece, but
any hanger will need to be adhered with 
glue of some kind. I want something that'll
be sturdy and long lasting, but won't damage the piece. 

I'll have to see what Home Depot has available. 


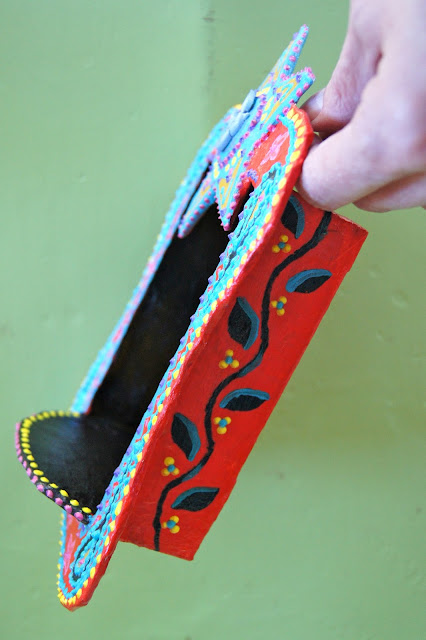
Up next is a side view of the piece. 
I had to make that pretty too.

You can get more of an idea of
it's size next to my hand in this pic. 


On Wednesday, I plan to share some funky
Christmas ornaments that I'm working on.

Hope your day is a good one!